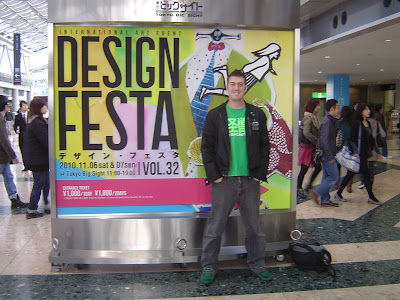
This weekend was a special weekend here in Tokyo for any and all who might be arty types or friends there of because this weekend was Design Festa weekend.... and it was Totally Awesome!!!!
However as it is 11pm here and I spent the whole day today padding around the masive Tokyo Bigsite talking to funky arty people and taking photos like a crazy tourist, after staying up half the night with the Toy Break crew on there 24 hour telethon thingy (which I also need to give you a run down on)........I’m shagged (the tired kind, if you’re Australian and reading that word differently). So I will be back later this week with more info for your pretty eyes to gobble up as well as photos and a heap of cool websites of amazing Japanese artists, a rad comic illustrator and some wicked toy designers… Yay!!!
So stay tuned folks...
Have a great start to the week... go kick some ass and enjoy!
Sunday, November 7, 2010
Saturday, November 6, 2010
ヨーコ・マルシェ オープン
Ninniqun
Back home safe and sound in Aomori
Labels:
Aomori,
charactor costume,
costume,
garlic,
Japan monsterosity,
mascot,
Ninniku
Thursday, November 4, 2010
ニンニキュン着ぐるみが完成
Ninniquns first little steps...dance?? You'll never guess whos inisde...???
See more ninniku stuff here
Labels:
charactor costume,
costume,
custom toys,
customizing,
garlic,
Ninniku,
Ninniqun
Tuesday, November 2, 2010
Monster Kolor presents IN LIVING KOLOR
Hey Found this awesome video interview by Design Festa Galleries of the In Living Kolor guys, Matt Walker and Mark Nagata.
Enjoy!
Labels:
Air brushing,
custom toys,
customizing,
Fesign Festa,
kaiju,
Mark Nagata,
Matt Walker,
Monster kolor,
Paint
Sunday, October 31, 2010
アダムの誕生日 (だけどニンニキュンの制作中)
As I mentioned in the last Ninniku update the day I did most of the work on Ninniqun was my birthday or at least the day organized to be my birthday celebration but due to being so busy I needed to cancel the BBQ we were going to have at my place so I could continue working and finish Ninniqun on time... this day was also special (possibly more so) because it marks the second anniversary of my decision to quit my Job in Australia as the senior costume cutter of the South Australian Theatre Company and set out on my own adventure, a decision which at times has been much more difficult to live than it was to make
So when I saw this little bit of video on the Ninniku blog I really wanted to share it here too…Although canceled, my new found friends here in Japan as well as some people I have known for a long time and are very dear to my heart, rocked on over to my house anyway, and they didn’t just visit they brought presents, food, cake and fun.
I have to tell you that while I was working my butt off and even though I was tired as and high on glue fumes (you can see the garlic skin fabric in my lap) these people gave me one of the best birthdays I have ever had, I truly felt special and it made me feel that my life here in Japan although tough sometimes will work out after all.
So once again a great big giant thank you to you special people, you know who you are...
Thank You!!!
Ninniku Update
Hey hey, so as I mentioned in the last post I have finished the giant garlic, Ninniqun, and he went off to his home in Aomori on the 19th.
Anyway because I have been so crazy busy I haven’t been able to keep you up dated, however as there is a typhoon today I have no distractions and no excuse not to sit here at my coputer and catch you up on all the Ninniku(garlic) happenings of the last month as well as some progress photos. As with all the other posts on Ninniqun, you can of course head on over to the Ninniku blog to check it out in Japanese.
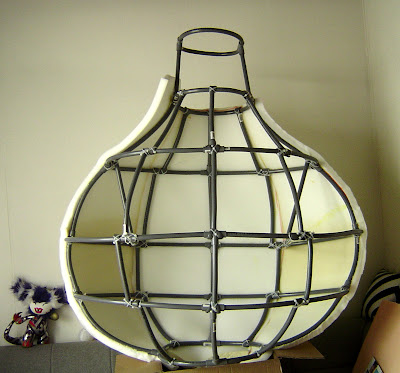
First up here are some photos of Ninniqun with half the foam on...
The following photos are from the Ninniku blog as I got more busy the documentation of the project on my behalf went out the window...
Full foam
I drew up the eyes so Aya could see what it would look like
On Japanese TV... yes, thats right I'm a star in my own living room...hehehe
Skin
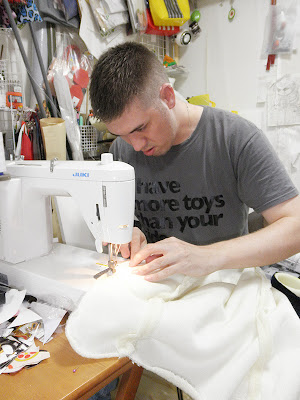
Sewing the garlic skin in my tiny work room
Putting the skin on, checking the fit
Face
Working out the face, we dide this before the skin was finished because Aya and Yu were at my house. Once we marked the face possition the skin came off again too finnish sewing it.
I was also lucky to have a faithful assistant handing me pins...
Aya and Yu work out the mouth position...
Working on the inside
Boots
Every one needs giant oversized boots... looks like blue is the colour of the day too.
Ninniqun
Alive and well in Aomori with friends and family
The day most of these photos were taken and the day the biggest part of this project was done, was originally organised for my birthday BBQ. However I was sobusy that i needed to cancle the BBQ. All my mates came over anyway and it turned into a grat day of working and fun.... So a great big thank you to all my palls here in Japan for coming over, keeping me company, and helping me out... you guys rock!
Labels:
charactor costume,
costume,
garlic,
mascot,
Ninniku
In Living Kolor
Last weekend I was super excited because not only did I get Ninnikun, the giant garlic finished (the reason I haven’t been able to post lately, at least, that’s my excuse and im sticking to it) for the Aomori festival but also because having finished that project I was free to go to the In Living Kolor show in Harajuku, Tokyo. This turned out to be the best and most awesomest weekend of all.
The show was held at the Design Festa galleries in Harajuku Tokyo and was a two part show held on Saturday 23rd and Sunday 24th of this month.
In Living Kolor, was the collaboration show of Matt Walker the creator of Monster Kolor a paint he has developed for custom toy pant work (released not so long ago), the dude behind Dead presidents Designs (his own personal art work) and also the dude behind Presidential Coatings (a custom production toy painting company) and Mark Nagata an awesome illustrator, artist, toy designer and the owner of Max Toy company...
In Living Kolor, was the collaboration show of Matt Walker the creator of Monster Kolor a paint he has developed for custom toy pant work (released not so long ago), the dude behind Dead presidents Designs (his own personal art work) and also the dude behind Presidential Coatings (a custom production toy painting company) and Mark Nagata an awesome illustrator, artist, toy designer and the owner of Max Toy company...
As these two guys have so much going on I will pull together a more detailed post on them individually in the coming weeks... thanks guys for giving me such great blog content!!!
The focus of In Living Kolor was the Japan release of Dead Presidents line of toy paints called Monster Kolor.
As mentioned the show was divided into two parts, on the Saturday there was a live participation painting day where artists and well any body else could go and give the Monster Kolor paints a test drive, unfortunately I wasn’t able to get there till later in the day so I don’t have many photos of cool people in action but I did meet a cool dude, Andy who runs the KaijuKorner blog so pop on over there later and check out his coverage of the day (lots of action shots).
I will also shamefully admit to you peeps (cos I know you wont hold it against me… will you?!) that although I was invited to play I was annoyingly to shy to pick up the air brush and give it a go…. But next time I will, I promise!!! No really I do!
Kaiju Painted with Monster Kolor
Shiny and sparkly!
Monster Kolor Clear
fave Kaiju
The Master at work
Students at work
The practice sheet
To finish up I really have to tell you this was a not only a great show but also a great experience, and not what I was expecting. While this was the first time Id met both Matt and Mark, both of them took the time out not only to chat with me about the show but were also interested in what I was up to, as well as super helpful with advice. It was really great to speak with people who were so open and willing to share there information and knowledge about there art and the industry, as a fella that wants to ge involed it was really awesome.
Live Monster Kolor painting
fave Kaiju
The second day was an open class given by Matt Walker on the art of Pin Striping and thankfully, I sucked it up and gave it a go. To my surprise and although terribly fearful of making a complete fool of myself, this was a lot fun… in fact it is an activity that takes time and patients and I really get into things like that. Again this is something I want to give you more information on so I wont dribble on to much about it here. I will say though that actually doing this is really hard, it looks a pinch when the master Matt Walker does it but once you give it a go you really developed a new appreciation for the art…. Stay tuned for more on this topic in the coming weeks.
Students at work
The practice sheet
To finish up I really have to tell you this was a not only a great show but also a great experience, and not what I was expecting. While this was the first time Id met both Matt and Mark, both of them took the time out not only to chat with me about the show but were also interested in what I was up to, as well as super helpful with advice. It was really great to speak with people who were so open and willing to share there information and knowledge about there art and the industry, as a fella that wants to ge involed it was really awesome.
Matt Walker
Mark Nagata
A big thank you to both Mark and Matt for a great show… we hope to see you again in Japan in the near future!!!
Labels:
custom toys,
customizing,
in living kolor,
kaiju,
Paint,
pinstriping,
toys
Wednesday, September 22, 2010
E47 Art
E47 ART
There is nothing better to me than to be poking around on the internet and stumbling upon something mind blowingly cool, and that’s exactly what happened to me tonight. I stumbled across this blog, saw these really cool toys and straight away I wanted to blog about them. I started clicking and reading, I was looking for who the toys were made by thinking they were some kind of production toys... I didn’t have to read very far to have my mind completely blown... Seriously I had a complete mind explosion... E47 Art makes this awesome robot figures himself and not only that wait for it, he makes them out of stuff like Christmas ornaments, plastic tube and plastic bottles. How fucking awesome is that!!! I mean to customize a shape is one thing but to build a toys this good from nothin is pure awesomeness. As for the paint work what can I say... really it speaks for itself dont you think.. Seriously sharp!
So I'm not only here to tell you to go have a look but I also want you to do me a favor, pop over to his blog and click follow the reason I want you to do this is because I think this dude should be making more of his cool awesome art toys. To help that happen we need to show our support, and if your a super cool person you will leave a comment, lets face its not hard to tell the dude how cool his pieces are.. So be a cool person and support this dude!
On the topic of customizing E47 really shows us that you can use anything and make really cool awesome art. Awesome work E47 Please keep it up and show us more!
Dude! Are you still here? Get you ass over there and leave a comment and dont forget to click follow on his blog!
Tuesday, September 21, 2010
Brusha, brusha, brusha!
Monsterforge, an artist that I wrote about in the recent past here at Monsterosity has caught my attention once again…
This time he has posted a cool painting tutorial on a technique called dry brushing. While most people (but not everyone and that’s ok!) have heard of the term dry brushing, and know it is a great way to highlight texture …what’s really cool is, Monsterforge shows us how to use this technique as it a blend on a flat vinyl surface to add depth to your customs, Monsterforge also teaches us some Jedi mind tricks or colour theory for thoes of you who wish to be boring, teaching us how the mind perceives colour… informative stuff people!
Really awesome Monsterforge! Thank you for sharing and teaching us some of your cool techniques!
You can go directly to this tutoial by clicking this link Brusha, brusha, brusha! or click any of the monsterforges an go to his blog to read more cool stuff.
Happy Customizing!
Tuesday, September 7, 2010
Vampires and the use of Acrylic Paint Brushes
Painting with acrylics can be great fun. However, the acrylic paint brushes you use are essential to the quality of your finished painting.
A good set of paint brushes will make your painting time easier and more enjoyable but that doesn’t mean you need to mortgage the house for a quality set… if I told you that you wife(or husband) would hunt me down and kill me.
There is a wide range of quality and prices out there, both available on the web and at your local art supplies or hobby store.
It is usually cheaper to buy your (first/starter)) brushes in a kit as apposed to individually… however don’t get sucked into pretty boxes/ cases and all that, as the likelihood of you using the box/case is slim to none. I got fooled into this trap (by myself sadly and not by some cheesy used brush salesman)…and I’m embarrassed to say I paid more for the pretty case thinking I would keep my brushes beautiful and pristine in the case… now my brushes while clean and in good order are livin in an empty jam jar on my desk, the pretty case is in the cupboard.
That said if you intend on traveling with your brushes then maybe it’s worth the consideration… But if your cherished loved one sees you paying an extra $20-$30 for a pretty case your not gonna use… your on your own buddy.
Painting is a large part of customizing toys, once all the shape modification (if you’re customizing the shape) is done the final stage is usually painting your character. Painting your figure can be done with various different paint mediums however because acrylic paints are the easiest and most commonly used I’ll focus on brushes for acrylic paints in this article.
There is a wealth of information out there on brushes and lot of the information about brush sizes, shapes and uses is in fact common for all of the main paint mediums and many of the brushes are some what interchangeable.
Originally oil paint brushes, which were and still are made from natural hair fibers, were used for acrylic paints, but these days an ever increasing range of acrylic brushes, designed specifically for this medium are readily available..
You can or course use almost any kind of brush either natural or synthetic depending on, what you are trying to achieve, your style and own personal preferences… and who am I to tell you other wise. However acrylic paints although generally no toxic are ruthless on brush fibers making the synthetic (usually nylon) brushes more resilient than natural fibers. Using nylon brushes for your acrylic paints will ultimately make your life easier because they will be easier to clean and care for in regards to using them with your acrylic paints. Acrylic paint has a tendency o stick to natural fibers turning your much loved and pricy sable brushes into hard pointy stabbing tools better used for killing vampires than painting. So unless you have a vampire problem in your studio, in the long run using the nylon brushes (with your acrylics) will also save you some money… and make me popular in the eyes of your loved one.
You can of course get nylon filament brushes in a wide range of sizes, shapes and also for use with different paint mediums…. These brushes usually come in both short and long handles depending on your painting style and you can use your acrylic paint brushes with oil paints with out issue, provided you care for them appropriately. We will go into care and maintenance in another article later on.
Below are the main types of acrylic paint brushes and what brush strokes they're generally used for. At first I wasn’t going to list all the different types of brushes because I didn’t think some of them would be appropriate for painting on toys however on second thoughts customizing and painting toys is a widely creative arena and so I figure appropriateness should be left up to you the artist to decide.
Acrylic Paint Brush Shapes
Rounds - Good for touching in or for more detailed work. Especially useful with slightly thinner acrylic paints.
Long Flat - Holds plenty of paint and good for applying thick (impasto) layers. Produces longish, straight brush strokes, so excellent for painting doors and windows or anything that has a straight edge to it.
Short Flat or Bright - As above but when required for shorter strokes. Good when you want to leave a multitude of well-defined brush strokes on the paint surface. Both the short and long flat acrylic paint brushes, when dampened with paint, come to a lovely chisel edge, ideal for thin straight lines.
Filbert - Flat profile but with a slightly rounded point. Makes tapered strokes and has the ability to soften the edges of a brush stroke.
Fan Brush - Flat profile spread as a fan. Ideal for blending cloudy skies or any area where you want a smooth transition between colors. Also very useful for creating leaf clusters on pine and fir trees or textures such as fur.
When using a fan brush for acrylics, sometimes it is better to use a natural bristle type brush as they tend to hold there shape better with paint on them, often thinner nylon filaments can stick together causing the brush to loose its shape. This however does depend on the viscosity (thickness) of the paint and the effect you’re trying to achieve. Have a play and see what works for you.
Rigger - Although not strictly an acrylic brush, I've included it here as it performs the same function as in watercolor, i.e. very fine lines such as ship's rigging (hence its name). It's best to use thinned acrylic paint to achieve such effects.
I hope you found the above information helpful and you can apply it to your next custom painting project. Please book mark this site and come back often as I will add more info as time allows.If you think there is information that should be added to this artical please leave me a comment of email me at...
Have a wickedly awesome day...
Subscribe to:
Posts (Atom)


